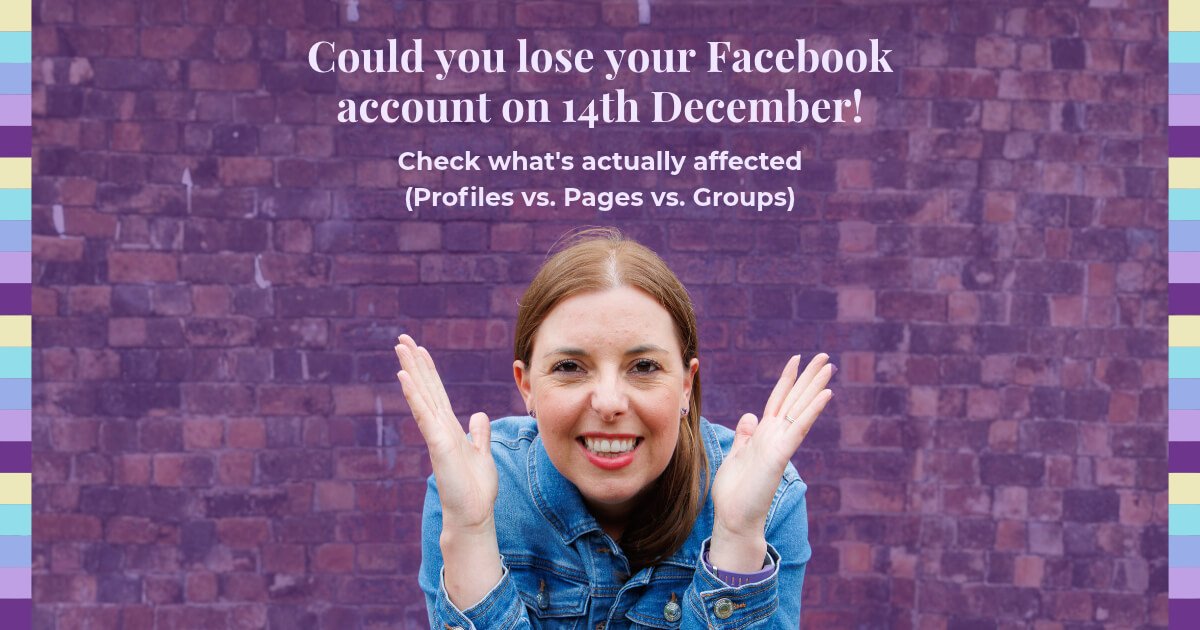
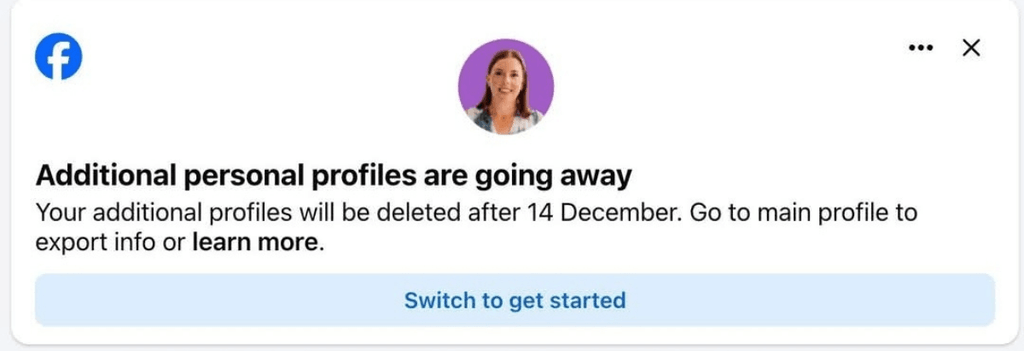
Have you had a new notification appear on your Facebook account saying it will be deleted on 14 December 2026? Firstly, don’t worry, your original Facebook account isn't disappearing.
However, if you've ever set up an extra personal profile under your main login to keep your business, groups, or hobbies separate from your family life, this is called an additional profile. And it’s these additional profiles that are going from 14 December.
Since the announcement, there has been huge confusion over who is impacted: "Does this affect my Business Page? What about my Facebook Groups? How do I even know which one I have?"
Here is everything you need to know to check if you're affected, what is completely safe, and the exact checklist I'm using right now to transition my own profile without exposing 20 years of family photos and memories currently on my original account.
Do These Facebook Account Changes Affect You? (Profiles vs. Pages vs. Groups)
Meta is permanently removing Additional Profiles (the feature they rolled out in September 2023 that allowed you to create up to four extra personal profiles tied to one main login). After 14 December 2026, any additional profiles, along with their posts, photos, and messages, will be permanently deleted.
Here is the biggest source of confusion: Facebook Business Pages and Facebook Groups are NOT being deleted. They are completely safe. What is affected is who owns or admins them. If your Additional Profile is listed as the Admin of a Page or Group, you must switch that Admin role over to your original personal profile before 14 December.
Here is a quick cheat sheet so you can see exactly where you stand:
| What You Have | Is It Being Deleted? | What You Need to Check Before 14 December |
|---|---|---|
| Your Original Personal Profile | NO — 100% safe | Nothing to worry about, your original Facebook account stays as it is. |
| Additional Profiles (sub-profiles under the same login) | YES — Permanently deleted | Export your data before 14 December, reconnect with friends/groups, and step down from any Admin roles. |
| Facebook Business Pages | NO — 100% safe | Nothing to worry about, Pages are linked to your main Facebook account / Meta Business Portfolio, not Additional Profiles. |
| Facebook Groups | NO — The Group itself is safe | Check the Admin: Switch Group Admin ownership from your additional profile to your original personal profile (or the group will be paused!). |
How to Tell if You Have an Additional Profile (and Not a Business Page)
1. How to Spot an Additional Profile ❌ (Being Deleted 14 December)
An Additional Profile is a secondary personal-style profile created inside your main Facebook account.
- Log in on a desktop computer first: This is my biggest tip! On my Android phone, I had zero notifications about this change, even though some people have seen the alert on mobile. As soon as I logged in on a laptop, the "Additional profiles are going away" warning banner was right there.
- Do you have "Friends" or "Followers"? Standard profiles (including Additional Profiles) have Friends and an Add Friend button, whereas Facebook Business Pages only have Followers / Following. Please note: The only exception is if you've manually turned on "Professional Mode" on your original profile, which switches it to a Follow button, so checking using the other points is the best way to be sure.
- Check how long you’ve had your profile and your login details: Additional profiles only came out in September 2023, so if your Facebook profile has posts or photos older than that, you are looking at your original account. If you switch between two personal profiles (which have separate friend lists and personal feeds) using the exact same email address and password to log in, the secondary one is an Additional Profile and will be deleted.
2. Facebook Business Pages ✅ (The Page Is Safe)
A lot of business owners are panicking because they are confusing a Facebook Page with an Additional Profile. Your Business Page is not going anywhere.
- How to spot a Page: On a desktop computer, look at the left-hand sidebar. If it says "Manage Page" (with insights, ad tools, and professional dashboards), it is a Business Page. On mobile, you will see a "Professional Dashboard" button or "Switch to Page" option rather than a standard personal profile layout.
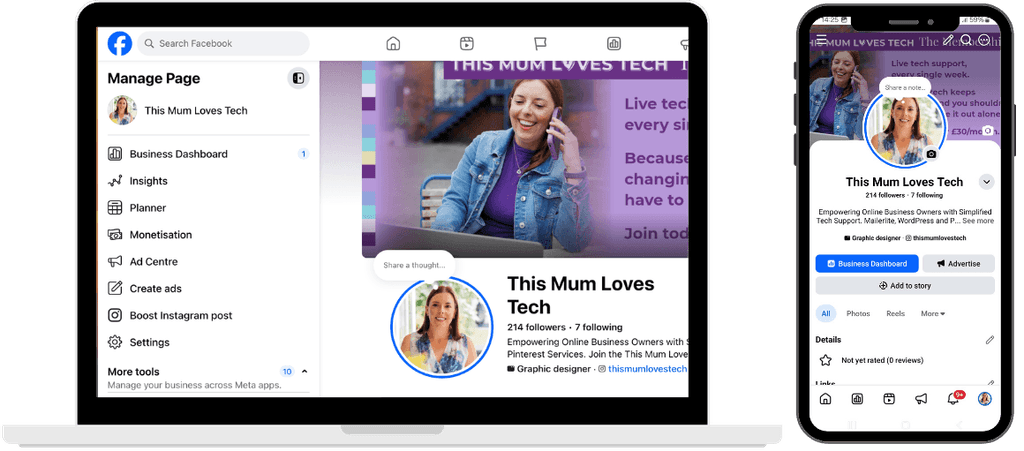
- No Admin switch needed for Pages: Because Facebook Business Pages are tied to your main Facebook account (and managed through your Meta Business Portfolio), you don't need to worry about your Page losing its admin when Additional Profiles are deleted. If you want total peace of mind, you can double-check by opening your Page on a desktop computer, going to Settings > Page Setup > Page Access, and confirming your original personal profile (or Meta Business Portfolio) is listed with Full Control. (Unlike Facebook Groups, you can't even add an Additional Profile as a Page admin, so your Business Page is 100% safe!)
3. Facebook Groups ✅ (The Group Is Safe, Just Check the Admin)
Facebook Groups are not being deleted either. Again, your group itself is fine, what matters is who is listed as the Admin.
- The Admin check: If a group's only Admin is an Additional Profile, Facebook will pause the group once that profile is deleted on 14 December.
- My own example: My This Mum Loves Tech community, along with several of my challenge groups, have been set up using my Additional Profile. The groups themselves aren't disappearing, so I need to add my original personal profile as an Admin on every single one of those groups before 14 December so they keep running without interruption.
What if You Have Two Completely Separate Facebook Logins?
If you created a second Facebook account years ago using a different email address and password, that won't be deleted on 14 December. (Just bear in mind that having two separate logins actually goes against Facebook's one-account-per-person Terms of Service, which is why they introduced Additional Profiles in the first place!)
Why I Originally Set Up an Additional Profile
I've been on Facebook for 20 years. My original personal profile has highlights from most of my adult life, backpacking trips, meeting my now-husband, announcing the births of our boys, and I didn’t want those seen publicly, so I kept my profile private.
The problem came when I started my business and joined business Facebook groups; people would start friend-requesting me, and if I didn’t know them, I was rejecting those requests and directing them to my Instagram account instead.
That worked some of the time, but other times those connections were lost. So when Facebook launched Additional Profiles, it felt like the ideal solution: I could have a public, business-focused profile to run This Mum Loves Tech and network in groups without touching my original personal account.
Now that Meta is pulling the plug on that feature, I'm bringing the two profiles back together on my original profile. Facebook groups are still such a brilliant place for me to make connections, and I need an active profile to run my own community and rejoin the business groups I'm part of.
That's why I’m following every single step below before I make the switch, making sure those 20 years of memories (which I love and want to keep seeing pop up in my feed!) stay hidden apart from my close friends and family.
Step-by-Step Checklist to Switch Your Profiles
If you have an Additional Profile, do not leave this until 13 December. Exports can take time to prepare, and admin invitations have to be manually accepted. Here is the exact order of steps I'm following:
Step 1: Export Your Additional Profile Data Immediately
Before anything gets deleted, download a backup copy of your posts, photos, messages, and connections so nothing is lost:
- Switch into your Additional Profile on a desktop computer.
- Click your profile picture in the top right and go to Settings & privacy > Settings.
- Click Accounts Center (top left), then select Your information and permissions > Export your information.
- Click Create export, select your Additional Profile, and choose Export to device (or Export to external service like Google Drive/Dropbox).
- Select the information, date range, and format you want, then click Start export.
Please note: Exports can take a few hours to prepare. Once Facebook notifies you that your file is ready, you only have 4 days to download it before the link expires. (And if you have more than one Additional Profile, you'll need to request a separate export for each one.)
Step 2: Hide Your Personal Posts on Your Main Profile Before You Move Anything Over
(Fair warning: Depending on how many years of history you have on your original account, this is the most time-consuming part of the process, so don't leave it until the last minute! To give you a realistic idea, I had posts and photos going all the way back to 2007, and working through all my posts, albums, and tagged photos took me at least an hour.)
Before you start adding business contacts or becoming the public admin of groups from your original personal profile, make sure your personal history is hidden from public view first:
- Create a "Close Friends" list: Add your trusted family and real-life friends to a custom Close Friends list. Going forward, share personal family photos exclusively to Close Friends, you still get to share updates with relatives around the world and keep those precious "On This Day" Facebook Memories, while strangers see nothing.
- Hide past timeline posts (and your photo albums at the same time!): First, go to Settings & privacy > Settings > Posts and click Limit who can see past posts (this stops anything old being Public). Then, head to your Activity Log (Your Facebook activity > Posts > Your posts, check-ins, photos and videos) to bulk-change older posts to Only me in batches.
Good to know: Facebook's bulk-edit tool only lets you switch multiple posts at once to Public, Friends, or Only me, not custom lists like Close Friends. However, doing this in the Posts section automatically updates your photo albums to Only me at the same time (saving you from having to edit every album individually!), and still keeps all your "On This Day" Facebook Memories intact for you to enjoy!
- Double-check your custom & profile albums: Once you've bulk-updated your posts, quickly pop into Photos > Albums to make sure your custom albums now show a padlock (Only me). If there are any specific albums you still want your inner circle to browse, click the three dots (•••) > Edit album to switch just those to Close Friends. Also glance inside your Profile pictures and Cover photos albums to hide any older family photos, as those two system albums don't follow standard album rules.
- Manage tagged photos (keep business tags public, hide personal ones!): Go to Settings > Profile and tagging and turn ON "Review posts you're tagged in before the post appears on your profile?". Leaving your tagged-post visibility set to Public while turning Review ON gives you the best of both worlds: whenever someone tags you, you get to approve it first. You can click Add to profile for great business shout-outs so new connections see them, and Hide from profile for family photos of the kids so they never appear on your public timeline! (Tip: To clean up past tags, go to your profile on desktop, click Manage posts just below the status box, filter by Tagged posts, and hide any old personal ones.)
Step 3: Give Your Main Profile a Business Makeover (and Test It!)
Once your family photos are safely hidden from public view, update your public-facing storefront:
- Update your profile and cover photos: Remember that current profile and cover photos are public by default, swap them out for a professional headshot and a business-branded cover banner.
- Audit your "About" section: Check your bio, website links, and contact details so public visitors see your business info, while personal details stay visible only to Close Friends or Only me.
- Consider turning on "Professional Mode" (completely free!): Under the three dots (•••) on your main profile, you can switch on Professional Mode, it doesn't cost a penny, is completely reversible, and adds a public Follow button so people can follow your business content without needing to be your personal Facebook Friend (while your Close Friends posts stay completely private to your inner circle).
- Add a "test friend" before you reconnect with everyone: Once you've switched your profile to public, but before you start sending friend requests or rejoining groups, ask one person who isn't already a friend on your original profile to send you a friend request. Check what they can see both before you accept their request (as a stranger/follower) and after you accept it (as a new friend). It's the best way to spot any sneaky old album or tagged photo you missed!
Step 4: Transfer Your Facebook Group Admin Roles (Crucial!)
Once your original personal profile is ready, make sure you switch over Admin ownership on any groups you run (like my This Mum Loves Tech community and challenge groups) before 14 December:
- Join the group from your original profile: Switch into your original personal profile and join the Facebook Group as a regular member first (if your group is private, approve your own join request from your Additional Profile!).
- Open the group's Members tab: Switch back into your Additional Profile, open the group on a desktop computer, and click Members (or People) in the menu just beneath the group's cover banner.
- Invite your original profile as Admin: Find your original personal profile in the member list, click the three dots (•••) next to your name, and select Invite as admin (or Add as admin).
- Accept the admin invite: Switch back into your original personal profile, open your Notifications bell (or visit the group directly), and click Accept on the admin invitation.
- Double-check the Admin list: Refresh the group's Members tab and look under Admins & moderators to confirm your original personal profile is listed as an active Admin before 14 December.
Step 5: Reconnect Your Community & Post a Quick Heads-Up
Once your original profile is ready and your group admin roles are safely transferred, it's time to bring your network across:
- Rejoin your groups & reconnect with contacts: Using the group and friend lists from your Step 1 export (or Facebook's Review connections tool if it appears on your account), rejoin your key business groups and reconnect with your contacts from your main profile.
- Save any important DMs before 14 December: While your main data export backs up older Messenger chats, Meta started rolling out default end-to-end encryption in December 2023, which means any DMs from late 2023/early 2024 onwards won't appear in that main download file. (There is a separate way to download encrypted messages through Messenger's "Secure storage" settings on desktop, though it's a bit more technical!) The easiest approach is simply to scroll through your Additional Profile's inbox before it closes and screenshot or copy-paste any active client enquiries or important links so nothing gets lost.
- Post a "where to find me" update on your Additional Profile: Pop a quick post on your Additional Profile letting people know it's closing on 14 December and linking them over to your main profile so nobody loses touch.
- Give your personal friends a heads-up: Finally, post a warm update on your original personal feed to let family and friends know they'll start seeing more business posts from you, and reassure them they're on your Close Friends list and won't miss a single photo of the kids!
Want Me to Walk You Through This Step-by-Step? Join My Live Masterclass!
Tech changes like this can feel overwhelming when you're trying to run a business and protect your family's privacy at the same time, and you definitely don't have to figure it all out on your own.
On Monday 7 December at 1PM UK time (just one week before Meta's 14 December deadline!), I'm hosting a live, practical masterclass inside the This Mum Loves Tech membership where we'll work through this entire transition together, step by step.
I'll cover:
- Hiding your personal photos and posts so your family memories stay strictly for your inner circle
- Setting up Facebook Professional Mode and optimising your main profile for business
- Safely transferring your Facebook Group admin roles so nothing gets paused
- Live Q&A so you can get your exact profile questions answered before the deadline
The This Mum Loves Tech membership is £35/month (with a 3-month minimum commitment, and you can cancel anytime after that). Join today to get access to the Monday 7 December masterclass (plus the replay if you can't make it live!), alongside the full library of tech masterclasses and a private WhatsApp group. Join the community of other amazing business owners and realise you aren’t the only one who needs support with your tech.
👉 Join the This Mum Loves Tech Membership here and save your spot for 7 December